Creacomp
SERVICES

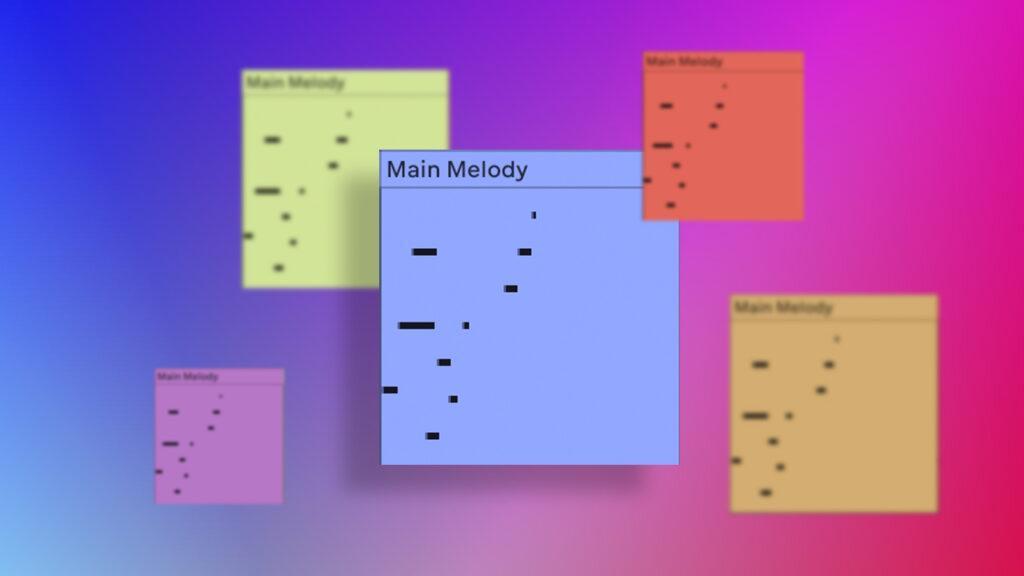
WRITING A MELODY
What Are the Components of a Melody?
A melody consists of two primary components: pitch and duration. In music theory, every note vibrates at its own distinct frequency, which determines its pitch—how “high” or “low” it sounds. Duration refers to how long a note is held. For instance, a quarter note is a note that lasts one-quarter the duration of a measure written in 4/4 time. Duration also refers to the length of breaks between notes.
3 Types of Melodies
Most melodic ideas come from either a chord progression or a scale, with one notable exception.
1. Chord-based melodies: Some songwriters start their melody-writing process by writing a series of chord changes. They then compose melodies based on chord tones—the notes that make up each chord.
2. Scale-based melodies: Scale based melodies are comprised of notes within a particular scale or mode. For instance, a C major melody might only use the notes found in a C major scale (indicated by a key signature with no sharp or flat notes). Major and minor scales usually contain seven notes (some minor scales contain more), but you can compose a great melody using fewer notes. Pentatonic scales, which only have five notes, frequently appear in pop music production.
3. Monotone melodies: Technically, melodies can also be monotone rhythmic patterns. Some hip-hop vocal melodies fit this category, as do dance beats in some EDM songs. This doesn’t mean that every drum beat counts as a song’s melody, but if there aren’t any pitched sounds layered on top of it, a rhythmic pattern can serve as the melody for a section of a song.
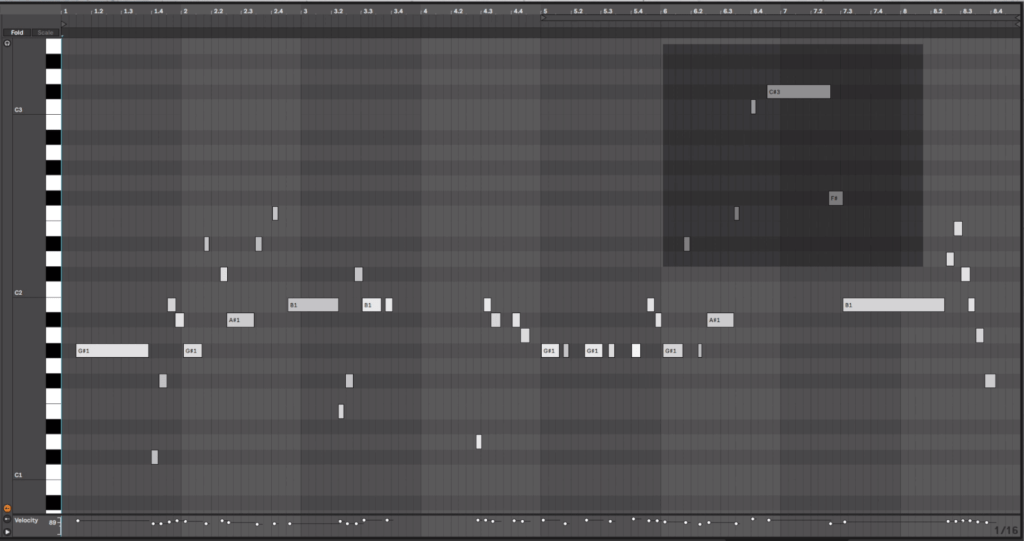
MAKE THE DRUM BEAT
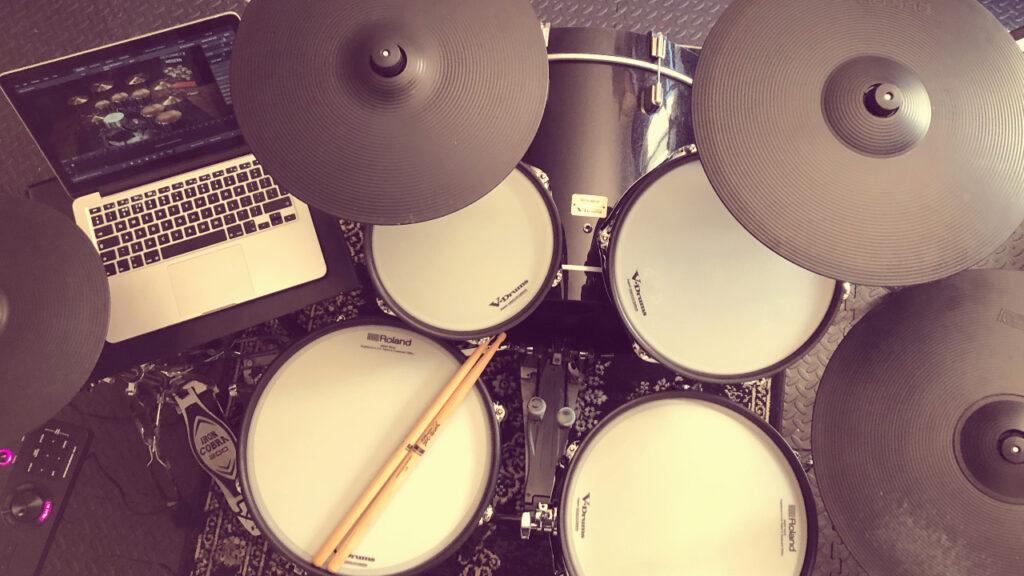
The main elements of a drum beat are the kick drum, snare drum, hi-hats, and toms/percussion. Once you have a drum track set up and linked to a drum plug-in, there are a few different ways of recording drum beats.
One option is to pull out the piano roll and use your DAW’s pencil tool to draw where you want each drum hit to go on the grid. This method is great and quick if you know the pattern you want.
Another method is to create a drum beat with a pattern sequencer. The advantage of using a pattern sequencer is that they speed up the process of creating drum patterns because they usually come with tools that make repeating things, like hi hat patterns, super easy.
Alternatively, you can perform the drum beat on a MIDI beat machine. This method is ideal when you want your performance to have the human element of subtle imperfection. When using the pattern sequencer or pencil tool methods, the outcome is usually too perfectly quantized which can make your beat sound lifeless and will require you to go back and add subtle timing imperfections and velocity variations
CREATING A BASSLINE
Bassline represents the core of every modern song. Whether it’s subtle or highly exaggerated, without it, contemporary music would sound deficient. If we try to explain it, a basic definition would be the following: Bassline is a low pitched instrumental part of a song or sequence. It is usually played on the lower register of instruments such as guitar or piano. This also goes for any other instrument that possesses lower octaves.
An awesome sounding bassline almost always consists of two factors, an excellent sound, and a great groove. In other words, the bassline uses low notes that provide rhythm while simultaneously setting out the foundation of the chord progression. Furthermore, the bassline bridges the gap between the rhythmic part played by the drummer and the melodic lines played by the lead guitarist and the chordal parts played by the rhythm guitarist and/or keyboard player.
Matching the bassline with the kick drum
It goes without saying that a good relation between bassline and the kick drum is the main foundation of the track. Try to deal with that at the beginning of the mixing process. That’s because it is always easier to mix other elements of the song according to kick drum and bassline than vice versa.
Don’t be afraid to learn from others
Take a track that you like and listen to its bassline — the color, the volume, how it sounds together with other elements of the track, etc. By trying to imitate it, your hearing will benefit from it. This might lead you to something different, which could also sound great. However, use this tip to amplify your skills, not to plagiarize.
Layering
There are many great sounding synthesizers or sample libraries out there. Since some of them are expensive and you are maybe not in a position to own them all, use what you have. Try to make your bassline by layering two or more sounds. Use tools like compressors, equalizers, distortions, and so on to bind them all together.
Sliding notes
In many genres of music, smooth transitions between bass notes sound great. You can achieve that with portamento/legato, which is a part of every hardware or software synthesizer. This is doing wonders on electric, acoustic or synthesized basslines.
Harmonizing
The bassline is usually following the root notes of the chords played by the other instruments. The whole flavor of the song can be transformed if you change the bass notes to others that are in harmony with your chords.
VOCAL RECORDING

Before we look at how to record vocals, check the settings of your DAW. You may have to refer to the manual for this. It’s best to set your audio sample rate to 48khz and the bit rate to 24. This is pretty standard these days. The only time these settings may change is if you have imported a session that has been created using different settings or if you are asked to by your client for specific specifications.
Tape Vs. Digital
In the “good old days” of tape, recording engineers favoured quite high input levels and there are some engineers who still do, they adjust the input level so that the loudest parts hover just under zero on the metre and rely on a hardware compressor to control the peaks so that they don’t overload. This was to reduce as much as possible any noise inherent in recording to tape – known as “tape hiss”. It is no longer necessary.
Digital vocal recording has a much lower noise floor and there is negligible difference in quality across quite a wide dynamic range. My vocal recording sessions usually peak at around -10db. This gives me 10db of safety margin in case a vocalist decides to take me by surprise and blast out a super loud note and it’s an easy process to raise the gain of the recorded material.
‘Good In, Good Out’
When recording any audio, my favourite mantra is “Good in, good out.” Your goal is to capture the sound as true to the original as possible so that you are in a better position and have more options whatever you do after your session.
For example, with some simple DSP (Digital Sound Processing), it would be easy to make a crisp, clean vocal recording sound like the session was conducted in a bathroom. However, you would struggle to make a session recorded in a bathroom sound like a crisp, clean vocal recording. Don’t settle for something you are not entirely happy with, assuming it can be sorted later when you mix down.
Vocal recording audio can go through many different processes after recording. Each one acts on, not only the pure vocal sound you intended to capture, but also changing and enhancing the artefacts that also got into the vocal recording unintentionally. (i.e. reverberant sounds and outside noise.)
So, for example, a tiny bit of the vocal mid-range can be heard reflecting off the ceiling but you decide it isn’t that big a deal. Just wait until you’ve compressed and effected the vocal recording (raising the noise floor). Now suddenly you’ll notice it more and more until eventually, every time you audition it, you won’t hear anything else.
Directional
Condenser microphones are “directional”. This means that they pick up the strongest, purest sound from directly in front of them.
If your singer moves around too much, particularly from side to side, it will show up in the recording. You may think that this manifests as just a variation in level, it doesn’t; the texture of the recording will change slightly too. And again, this variation will become more apparent when the singer has flown back to Alaska and you’re mixing down your takes.
Proximity Effect
Another important consideration is the distance from the mic. Changing the distance between the source and the mic changes the texture of the vocal recording. The greater the distance, the lighter and less “rounded” the vocal recording is. This is known as “Proximity effect”. This states that the closer the source to the microphone, the greater the level of the lower frequencies are recorded.
Proximity effect can be used as a technique. For instance, if you wish to create a warm, intimate vocal sound. Beware though, too close and it can sound too “boomy” or “boxy”. Also, the sensitivity of the microphone does it no favours in this respect. This is because if you are recording a singer close to the microphone, you run the risk of recording unwanted popping sounds created when the vocalist pronounces Ps or Ts. These are known as “plosives” although we often refer to it as “popping”. Placing a pop shield a few inches in front of the microphone can help to reduce this. However, it’s best not to solely rely on it.
Mic Surroundings
The mic surroundings play a big part in determining your options too. If you have managed to completely deaden the room, you have more flexibility in how far from the microphone your source can be.
It might be, however, that you were unable to eliminate all reflections in the room. In this case, your best approach is to move the source as close to the microphone as possible.
I have, on occasion, managed to conduct a vocal recording in quite noisy and reverberant spaces. You can do this by placing the vocalist much closer than I would normally be comfortable with. You then have to subsequently deal with the proximity effect and plosives with EQ and highly focused editing. I’ll cover mixing in the next section.
How Do You Know If Your Vocal Recording Is Good?
This is a question I am asked a great deal. There are only two precision instruments that can truly tell you if your vocal recording is good or bad… Your ears! I liken audio recording to drinking wine; you can spend years drinking $1.99 Liebfraumilch, but once you discover and start to appreciate the finer nuances of a vintage St Emilion, you’ll find it very hard to go back. It is one of the greatest pleasures of my job to hear a good voice well recorded; still gives me goosebumps.
Unwanted Noises
When you have finished your vocal recording, it is very tempting to assume that the prominent part of the audio – the voice – will mask every breath, mouth click, pop, rustle etc., particularly when set against the music. Whether you are sending your files on or mixing them yourself, this will almost always be a mistake. It doesn’t take long to audition your vocal recording and take out any unwanted noises that occur between vocal deliveries.
You can also add a “roll-off”. This is a simple EQ technique that literally rolls off the lower frequencies of the audio. This reduces a great deal of noise with it. This also helps to set the vocal into the mix, as lower frequencies, although not noticeable to the human ear, deliver more energy than high frequencies. The effect is that of masking other sounds rendering them harder to place. So, a 45-degree roll-off back from around 80hz will help. My DAW is pre-set with this.
Overusing DSP
There is a temptation, particularly when you have just purchased a new plug-in, to overuse Digital Sound Processing (DSP). What sounds great during a mixdown session at 80db sounds very different on headphones or on a small music device. There are too many forms of audio effects to go into detail in this article. Very quickly though, you’ve got time-based such as reverb, delay, chorus. You’ve also got dynamic such as compression, limiting, gate. I do have a general rule of thumb for time-based effects: apply it til it sounds amazing and then reduce the effect by half.
Now You Know The Basics Of Vocal Recording!
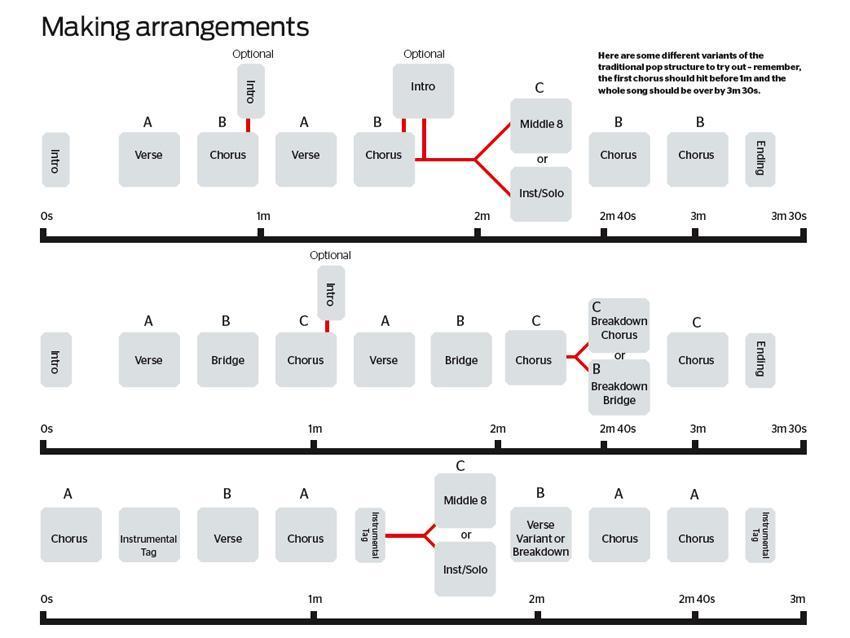
TRACK ARRANGEMENT
Intro: An intro is typically a multiple of 16 bars in length, and often introduces a new instrument or sound every 32 beats. Some intros open with drums and gradually add layers of instruments. A buildup or other aural cue lets you know the next section is arriving.
Verse: In songs with lyrics, each verse is usually different from the next. The verse sets up the theme of the song and naturally progresses to the chorus.
Chorus (or ‘Hook’): This contains the main message or theme of the song. It’s built around a melodic “hook” and is the most catchy and energetic part of the song.
Breakdown: This is a transition from the end of the chorus to the beginning of the next part of the song. Dance tracks tend to have very sparse Breakdowns, allowing lots of room to gradually build to an epic Drop.
Drop: In Dance Music, breakdowns are traditionally followed by a Drop, which is a super exciting part. It’s common for this to also be the Hook or Chorus, maybe with even more exciting added elements.
Chorus 2/Hook 2: Usually a repeat of the 1st Chorus, sometimes with some subtle differences.
Bridge: This is an optional transitional section near the end of a song. A bridge will occur only once, and musically and lyrically it’s different from the rest of the song.
Chorus 3: Some tracks will repeat the chorus a third time.
Outro: This is the closing segment. Usually the same length as the intro and often very similar in its arrangement. Where the Intro adds parts to build, an Outro gradually loses parts to fade the energy. DJs love to mix out of these sections as there is more space for a new track in the mix.